For a while, the Poppy Ergo Jr people have been building really cool things with Snap4Arduino, and the latest one just takes the whole cake!
Watch this robot ruthlessly beat the daughter of its creator at TicTacToe and celebrate its victory:
Gilles, the father of the defeated human, writes about it here.
For more Snap4Arduino + Poppy projects, take a look at this gallery, curated by Pierre Rouanet.
We’ve just published a new Snap4Arduino version, codenamed 1.1-beta.
These are the major changes included in this release:
New HTTP protocol, analogous to the one that Scratch 1.4 used to have (and thus S4A), that allows us to control Snap4Arduino via the Internet or LAN. To learn more about it, please refer to this old Scratch wiki entry. This also means you can now use our old S4A remote control Android app and webapp, which you can find here.
Exporting to Processing (“Arduino C”) has been heavily enhanced for servomotors and also for code that only needs to run once (outside of the loop() function). You can now also choose your own file names.
Switched to nwjs beta. This shouldn’t bother you at all, but it paves the way for me to bring Snap4Arduino to other platforms such as the RaspberryPi or the Chromebook. MacOSX users may experience a funny error when closing Snap4Arduino, which you can ignore for now. As this nwjs version moves forward, this error should go away.
Ability to disconnect servo motors, so that it doesn’t matter whether they’re properly calibrated, you can always make them stop.
Digital readings are now boolean reporters (predicates). Block-wise, this means they’re now diamond-shaped.
Added Snap!’s keyboard editing capabilities. To try them out go to settings → Keyboard editing.
One final announcement. Ove Risberg contributed, a long while ago, an enhancement to Snap4Arduino to program the board via wifi (instead of a USB cable or bluetooth module) using an ESP8266 module. We couldn’t get the time to include his changes in this release, but we’ll hopefully manage to do so before the end of this month.
Enjoy!
This release fixes a couple of mostly internal issues you will probably not notice, but what’s most important is it features a new, more streamlined deployment system that paves the way for potential new versions for systems such as the Raspberry Pi or Chromebook machines.
This new system makes deploying new versions really easy, and we’ll never need to compile the serial port plugin again, as we’re now using the latest nwjs, which supports native serial port communication out of the box.
Additionally, this side-fixed an annoying digital reading bug, and we’ve turned the digital read block into a predicate, which is what it should have always been.
As usual, you can get it here.
Enjoy! :)
Some days ago we received one of these emails that help us keep on doing what we do. It was sent to us by the parents of Emily Ulloa, a 7 years old girl from Ecuador, who presented S4A at BarCamp Ambato 2015, introducing herself as a robot programmer:
If you want to know more about her robots, you can check out this other video where she talks about Dini Robotini, a robot that can change its expression into different stages of sadness, happiness, surprise and other feelings by pressing some buttons, and that she envisioned can help autistic kids better express their emotions:
We want to encourage her to keep programming and being curious, the same way she encourages us to continue working on our projects!
A long time has passed since the last post, and a lot has happened since then!
We officially presented Snap4Arduino at the 2015 European Scratch Conference in Amsterdam, along with some other projects (Snapi! and BeetleBlocks), and we’ve been trying to get this new release ready since then.
It’s been once again thanks to Ernesto Laval that we’ve been able to do so, since we weren’t able to compile the serial port plugin for Win32 and he managed in just an afternoon!
Long story short, here’s what’s new in this release:
We’re sorry about many contributions we have received that haven’t been included in this release. We first needed to get these changes applied, and now we have a clean base on which we can begin to add all of these improvements and bug fixes.
So, hopefully, we’ll get yet another release soon!
Thank you all for your patience!
We’ve always been reluctant to add such a feature because we believe the main reason tools like S4A and Snap4Arduino are successful is because they inherit their parent project’s dynamic properties. That is, you still have a live environment while your board is plugged in, you enjoy immediate response, you don’t lose parallelism and you don’t need to compile or translate code into text and push it to the board to see what it does. Code is code regardless of whether you draw it, punch it into cards, stack blocks together or write it.
However, several people have been asking for this for a long time, and although we praise dynamism we do understand the reasons behind this. So, lo and behold, you can now translate simple scripts into Arduino sketches!
To get this working, go to the File menu and select “New Arduino translatable project”. This will open a new project in the Arduino translation mode.
Translatable scripts need to start with a green flag hat block, and the main program loop is represented by a forever block. Once you’re done with your script, just right click on the green flag hat block and select “export as Arduino sketch”. Now you’ve got a .ino file ready to compile and push to your board.
Happy… compiling!
We never thought we’d ever end up saying that!
We are launching the first S4A/Snap4Arduino List Ninja Contest as an effort to help newcomers learn their way towards prototyping mastery while rewarding those who offer their knowledge and expertise to them.

Just register into our Community Mail List and start helping other members. Point to useful information, offer advice on their projects, share your solution to their problems, help them get started, etc.
The three most active users will be rewarded with three incremental prizes:
* You can choose your favourite t-shirt design and size
We will value not the amount of replies but also their quality.
Not at all! We will continue to offer as much help as we can!
Our community mail list receives quite a lot of messages, and we try to reply to all of them, but we are a small and busy team and many of these questions end up unanswered. This contest is aimed at helping fill this gap and getting newcomers to feel supported by the community.
We will be announcing the winners by the end of September, but we plan on launching similar contests often.
Of course.
Don’t worry. We know this is an oddly multilingual list, which is why we will be looking at linguistic percentages when awarding the prizes.
Both. Weird list. We know.
This release, Snap4Arduino 1.0.4 beta, addresses an issue reported by Valentina Chinnici, which prevented users from accessing the Sounds, Costumes and Background libraries.
Thanks, Valentina!
We have just released a new Snap4Arduino version that features a single improvement: now pin configurations happen automagically. You don’t need to set up pins before using them anymore, Snap4Arduino will check whether the pin you asked for is set to the correct mode, and fix the problem otherwise.
Don’t worry about older projects being loadable, the [set pin () to mode ()] block is still around and all of your saved projects will load properly, although this block has been deprecated and hidden from the UI to discourage its use.
We would like to thank Bruno Schwander, who suggested this change and convinced us it was the proper thing to do.
Happy prototyping!
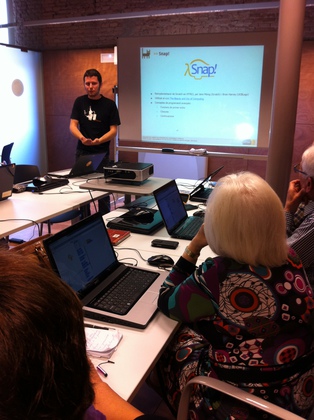
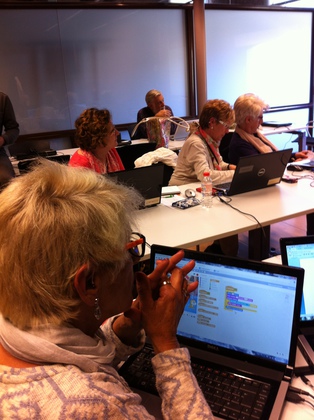
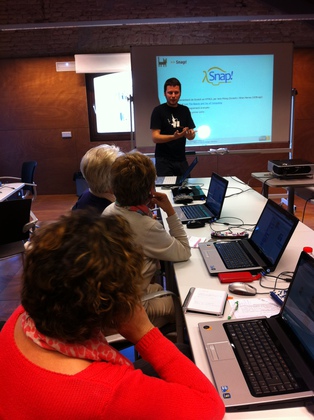
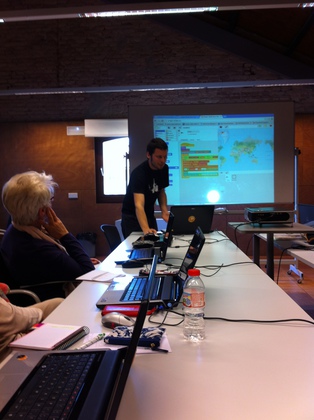
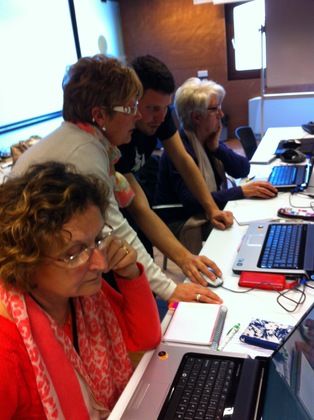
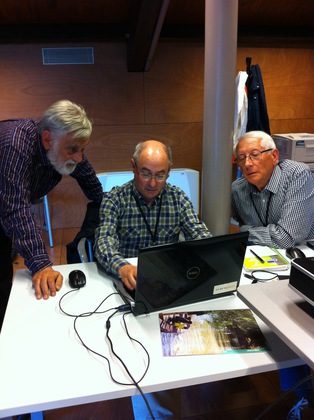
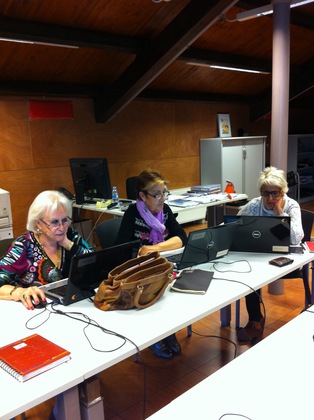
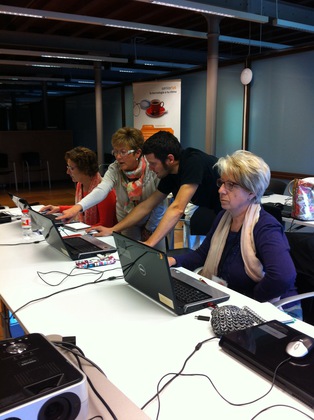
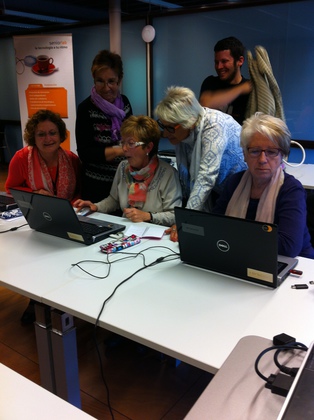
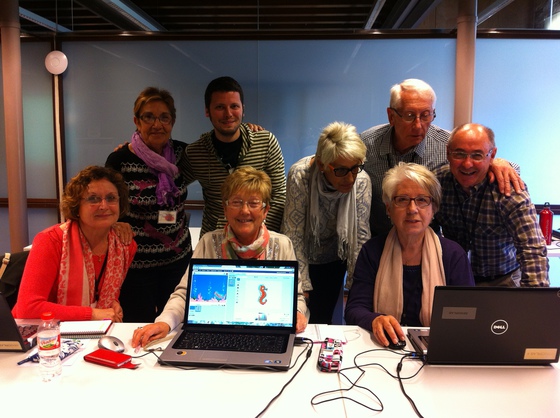
This year, at the Citilab, we have committed to get all of our interest areas and work groups closer, and just this week we have started bringing together two projects: Edutec and Seniorlab.
The ultimate goal of the Edutec team is to make programming available to everyone, but so far we have been primarily focused on kids and teenagers. Thus, this presents as a unique opportunity for us to see whether our experiences and tools also work with senior people, and so far are delighted to say they seem to work really well!
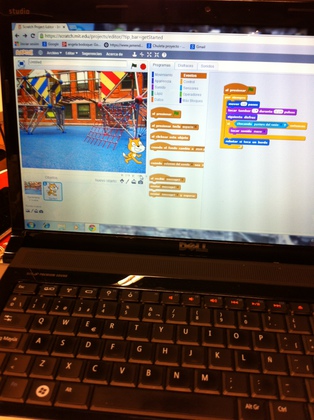
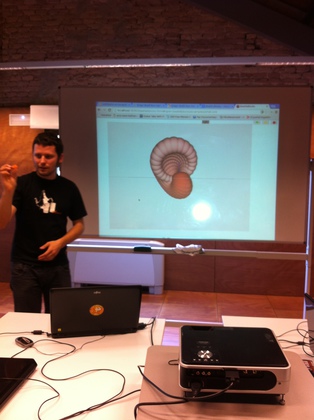
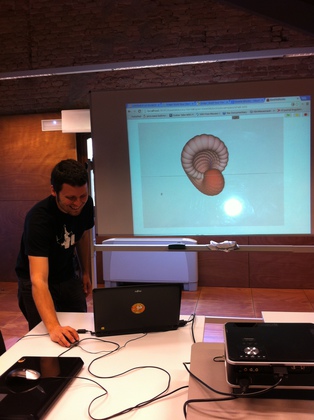
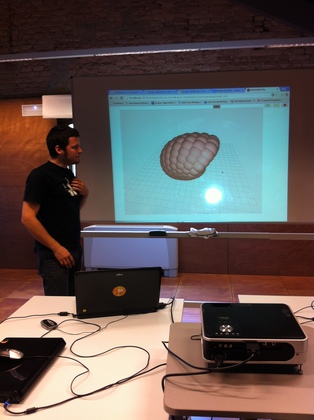
In our first presentation, we showed the seniors all of our tools and projects, and had them program a simple animation in Scratch, which they picked up immediately. The workshop had just started when they began pouring ideas of what they would use this new knowledge for.
Check it out for yourselves, at the Citilab, seniors can code too:
The next library is out, and this time allows you to control an ultrasound sensor like this one:
In this package you will find the modified Firmata you need to push to your board (UltrasoundFirmata.ino) and the blocks library for Snap4Arduino (Ultrasound-library.xml). Just File→Import it and you’re done: Ultrasound-Snap4Arduino.zip.
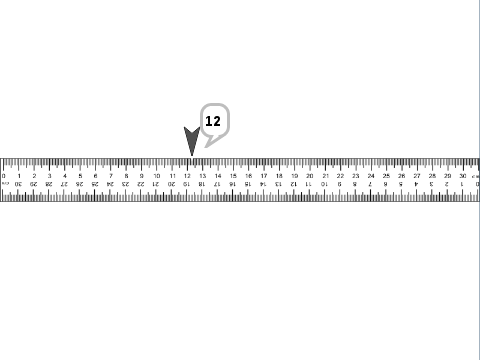
In the zip archive you’ll also find an example for Snap4Arduino that graphically shows the distance between the sensor and an object:
Happy measuring!
As promised, we are beginning to publish modified Firmata versions along with their block libraries for Snap4Arduino. This one allows you to control an LCD. Watch it in action:
We are using a 16x2 LCD display, but if your has a different number of rows or columns (as long as it is compatible with the Hitachi HD44780 driver) you will just need to modify the following piece of code in LCDFirmata.ino accordingly:
lcd.begin(16, 2);
Please follow the instructions in the Arduino official page (look for the Circuit section) in order to properly wire your LCD screen to the board.
In this package you will find the modified Firmata you need to push to your board (LCDFirmata.ino) and the blocks library for Snap4Arduino (LCD-library.xml). Just File→Import it and you’re done: LCD-Snap4Arduino.zip.
Enjoy it! :)
Although Firmata is a very complete firmware for the Arduino board, from time to time we find ourselves needing extended funcionalities and wanting to use devices not supported by default by the protocol, such as LCD screens.
In these cases, we are going to need to extend the Firmata firmware and build additional blocks in Snap4Arduino that mirror these new functionalities.
Take in account this is a tutorial for advanced users. Modified firmwares for different devices will soon be featured in our official site along with their Snap4Arduino XML files containing the corresponding new blocks.
In this example, we are going to modify the firmware so it can receive a new command that just turns a digital pin on. This functionality is of course completely useless, but is easy enough to understand and can be the foundation for any other complex behavior we need to implement.
Long story short, we just need to add a new case into the switch statement that takes care of SYSEX-based commands. Look for the sysexCallback function around line 320, and add the following code at the end of the switch block:
case 0x08:
    digitalWrite(argv[0], HIGH);
    break;
0x08 is the name of the new SYSEX command we have just added. In StandardFirmata, commands from 0x08 to 0x0F are free for us to use. argv[0] contains the first argument passed to this function, in our case it will just be the pin number. Notice how further arguments can be accessed just by increasing this index.
Believe it or not, we are done here! You can now compile and push this sketch into your board.
So, how do we trigger this new command from within Snap4Arduino?
We are going to need to build a new block. To achieve this, right click on the programming canvas and select make a block...:

Next, select the category you want to add the block to -Arduino in our case- and type in the block name. Notice how you can type arguments here too and deal with them later.
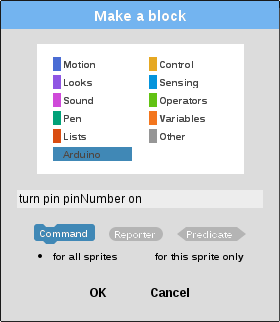
After pressing OK, click on the pinNumber label and select Input name in order to turn it into an argument:
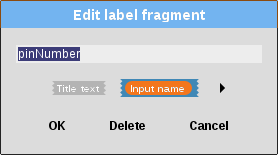
Click OK, and get ready for the complex part. We need to trigger a firmata.js function that sends a command to the modified Firmata firmware we have pushed into our board:

Don’t panic yet! Here’s what all this means:
this.arduino.board.sp points to the serial port to which our board is connectedwrite(new Buffer([])) is sending a data buffer through that serial port0xF0 is the START_SYSEX command, which tells Firmata to expect a sysex command0x08 is the command we added to Firmata beforepinNumber speaks for itself0xF7 is the END_SYSEX command, which tells Firmata this sysex command is finishedWe can now save the block and test it. Remember to connect Snap4Arduino to the board first:

And there you go, the LED has just been lit up!
Happy prototyping! :)
This simple robot receives a command via Bluetooth from an Android program written in AppInventor.
Depending on which command it receives, it performs a different action.
See it live here:
You can get the code for both AppInventor and Arduino here. Enjoy it!
Since we have sometimes experienced problems with our VPS provider, we’ve decided to set up some mirrors for all S4A files. We’ve also included previous versions, as some users had requested access to them.
You can find these mirrors here:
Sorry about the inconvenience, we hope these new locations will not fail as often…
We love to receive contributions, especially if they allow new users to join our community. This time, thanks to Frank Hunleth, we have a 64 bits GNU/Linux version available!
You can get it from our official site.
(And happy new year!)
It’s finally out!
We’ve just published the 1.6 S4A release.
Among other changes, you’ll find most interesting the following ones:
We want to thank the IMI (Informatics Metropolitan Institute of Barcelona) for having sponsored this version.
Please visit the community mail list for more information and news!
Happy holidays (and happy prototyping) to everyone!
We haven’t written in a long while, but that’s because we’re actually too busy working on several different projects and have literally no time left for writing.
To recap, during these months we’ve:
Besides all this, we’ve been building an activity database that aims to collect all of our teaching experiences in the last 7 years at Citilab. This project involves so much time and work that we’re not sure when it will be finished, let alone translated into three languages, but we’re confident we’ll manage somehow, someday.
Stay tuned!
This weekend we’ve been invited to the Maiker Faire Rome to give a workshop on Snap4Arduino, in which we wanted to get the kids to play with robotic cars (both ours and their MilkBots). Cables are really a nuissance when it comes to things with wheels, so we’ve been exploring how to connect the robots to some bluetooth modules we had laying around from an old project.
It wasn’t hard to get it working, and we’re really amazed how far the bluetooth signal reaches! We almost got the car outside the Citilab!
Documentation is only in Catalan, sorry about that! We’ll translate when we’ve some more free time.
We’ll be presenting Snap4Arduino at Scratch@MIT this year, so we’ve been pushing hard to fix some annoying issues before going on holiday.
First of all, we have to thank Ernesto Laval for his great contribution to the project, as he’s responsible for Snap4Arduino now fully working on MacOSX!
Additionally, we’ve fixed the following bugs and features:
You can head to http://s4a.cat/snap to fetch the new version for all three OSes.
Happy prototyping!
It took a little bit longer than expected, but we’ve finally released the first alpha version of Snap4Arduino!
There have been many changes and improvements since the last pre-alpha version, such as:
Snap4Arduino is now a desktop application, so you don’t need a browser anymore! This also means there is no intermediate server dealing with HTTP and WebSocket requests, which translates into a much (much!) faster development experience, and shorter response cycles between the PC and the board. Fewer layers and components also mean easier maintainance and development.
You no longer need to specify which board you are using. This means the same program will work regardless of the board you plug.
When you export a project, you don’t need to manually copy-paste (or right-click, download as) an XML anymore. A file dialog will pop up asking for a file name. This is also thanks to Snap4Arduino being now a desktop application.
Windows users can now enjoy an installer (and un-installer, although we hope you don’t need to use it).
All programs written in previous versions will work in this new release, as long as you first take care to remove the connect block. Since this block has been modified, failing to remove it before importing the project will result in an error and the software will most probably crash.
This version has been tested and found to work perfectly in all the boards we own at Citilab, namely:
As always, there will be bugs, so we need your help to hunt them and fix them until we feel the software is ready for a beta release.
You can find the new alpha version at http://s4a.cat/snap
Happy prototyping!
We’re still making preparations to release the new Snap4Arduino version, which has been delayed mainly because we’ve been busy finishing up the preparations for this year’s TecnoEstiu. In the last post we showed a proof of concept in which two Arduinos communicated via Morse by means of a laser and a photoresistor.
Still, children are more demanding than this, so we needed a story to tell. We’ve decided to go traditional, setting up a sea full of rocks through which a ship has to be guided by a lighthouse to reach the shore safe and sound, all this done via Morse.
Here’s Jose assembling it all:
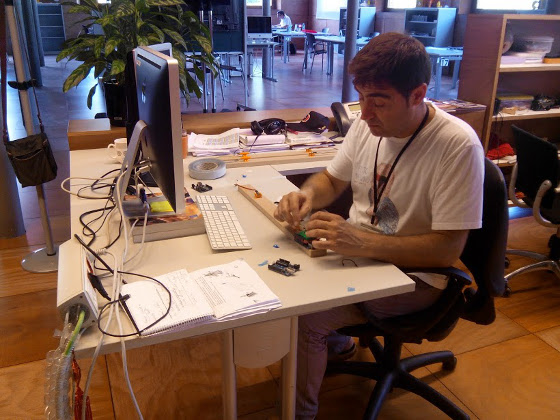
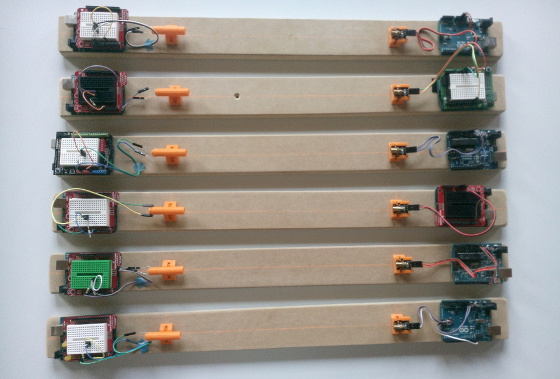
And here’s the final result: six emitter-receiver assembled pairs. All supports have been designed by Joan and 3D-printed here at Citilab.
If you want to see what the activity looks like, here’s a short video showing it in action:
We’re not publishing the code yet, as it won’t work in the current Snap4Arduino public release, but as soon as the new version is out we’ll be releasing the code for this activity as well.
Snap4Arduino is evolving fast, and next week we’ll be publishing a new version which we think is going to surprise everybody!
In the meantime, we’ve been preparing this year’s TecnoEstiu, which will revolve around digital communication. The first part of the workshop is meant to show children how the first long-distance communication protocols worked and paved the road of what is now so common for all of us.
So, nothing better than some good old Morse to understand what encoding and decoding messages means, and nothing better than lasers to transmit this information!
With a laser emitter plugged into an Arduino UNO board in one computer, and a light sensor plugged into another Arduino UNO board in another computer, I present to you the most anachronistic communication contraption ever:
Now, what if we put two of these in each home and pointed them to interconnected relay stations able to handle requests and distribute signals around, creating a global network that allowed people to exchange pictures of cats and get into arguments with strangers?
This week we’ve had time to focus on Snap4Arduino, which will be presented at Scratch@MIT this summer, and thus has to look presentable!
Here’s what has been fixed in this version:
Arduino Mega is now fully supported. Meaning you can use all of its pins, both analog and digital
Known bug causing number “0” to mysteriously disappear from dropdown list has been tracked down and hunted
Additionally, we have been working real hard to get the MacOSX version out soon, and we’ve done real progress. We have a prototypal version working in one of our iMacs here.
So, hopefully, a MacOSX working version will be released around next week. In the meantime, you know:
Remember you can find Snap4Arduino at http://s4a.cat/snap
So let’s make an S4A program to fix that!
In this demo, a real fan is switched on by means of a relay when the temperature goes over 19°C. There is also a virtual fan and a virtual temperature sensor, so you can play with both controllers and actuators in the real world and the virtual one.

Watch the video to see it in action:
You can get the code from here:
The next obvious example was to build exactly the same robot but on Snap!, and so we did:
The robot runs much faster because, in Snap4Arduino, we can control the servo movement with much more precision. The step time for the servos in this demo is of 0.05 seconds, which is ten times shorter than what we could achieve with S4A.
You can get the code from here:
Although the main purpose of S4A is to let you interact with Arduino boards (meaning, things you do in the computer have an immediate, real-time effect on the board), the recent S4A version for RaspberryPi allows for a somewhat autonomus behaviour.
For this demo, we’ve used the same line tracer code, but running on a RaspberryPi board powered by a USB battery. The whole thing weighs about a metric ton, causing our poor robot to constantly bunny hop, but serves as a nice proof of concept:
There is a very particular citizen workgroup at Citilab called Nous Artesans (New Artisans). It is a very heterogenous group, formed by people with very different backgrounds, ages and skills, but with a common interest in tinkering and building things.

take stuff apart > understand how it works > build new stuff
Their latest workshop consists in building a miniature model of a Smart City, for which they needed to build a free parking spot counter, so we did that for them by using S4A:
###By means of a 7-segment decoder
###By using digital and analog outputs
All code and datasheets can be found inside this package. Enjoy!
Given the recent developments by the S4A team (kits on the way, Snap4Arduino, and many other things we’re slowly cooking), we’ve thought it a good idea to start a blog where we can share our findings and advancements with everybody.
We’d like to remind you we have a community mail list where, as of today, 107 members share their doubts, experiences and suggestions.
That’s all for now, stay tuned for news!
Yesterday we built this cute (and super slow!) line tracer robot in S4A, as an example of what you’ll be able to do with the S4A Arduino Kits:
The code can be downloaded from here, and there’s a lot of room for improvement, so you can enjoy extending it and trying to make it run faster!